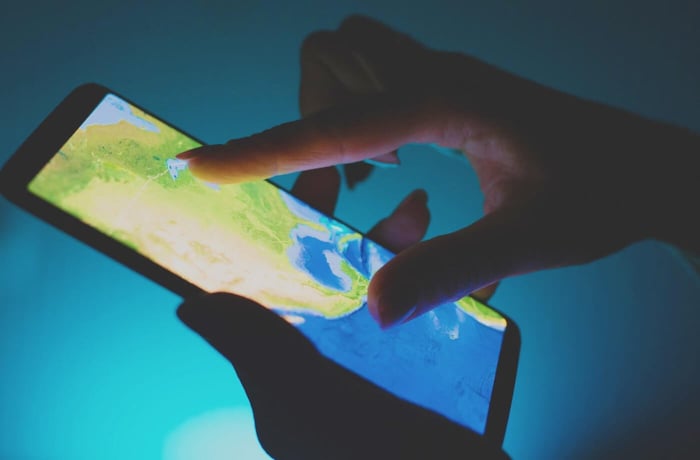
For anglers, the advent of Google Maps and Google Earth has been revolutionary.
The 2001 debut of Google Earth permanently altered the world of fishing. Anglers now have a tool at their disposal to meet all of their mapping and geographic information demands.
The days of hefty street directories and topographic maps, which were necessary for discovering suitable fishing locations, are long gone. Before, fishermen had to rely on low resolution and limited precision, which may send them to difficult-to-reach or inappropriate spots on the wrong trail.
Any angler may use Google Earth and Google Maps for free. Immediately after downloading, you may zoom in so closely that you can virtually see the five-pound largemouth behind that log.
Additionally, Google Earth's "Street View" function may place you on the ground at most well-known locations for a pavement-level perspective of the area you want to check out if you're wondering about a new ramp's size or parking.
Here are some pointers for enhancing your fishing adventures using Google Earth.
How to find fishing spots on Google Earth?
Google Earth is a versatile tool that can be customized to meet your needs. There are, however, a few basic options and resources that are helpful to every angler.
Preferences
Go to Preferences when you are first setting everything up. Although many of these choices are based on personal preference, you should not exclude Elevation Exaggeration. This tool emphasizes Google Earth's height differences, giving the impression that mountains are higher, steeper, and deeper canyons. This is useful when making travel plans because elevation changes frequently appear gentler than they are when using the default settings.

Use whichever exaggeration suits you the most. But 1.5 gives a reasonably realistic view of what you'll discover in the field.
You may also experiment with choices like "Use high-quality terrain." When looking for new areas, leave this selected if you want high-resolution imaging to look at trails, rivers, and lakes. You can uncheck it to speed up the software when browsing marked areas or managing places.
My Places
You may arrange and manage your waypoints and layers in Google Earth's My Places folder and file system.
To utilize Google Earth for fishing, you must be familiar with My Places. When you start, you'll observe that you have a Temporary Places folder and a My Places folder. It's critical to understand this difference.
You store all of your stored layers and waypoints in My Places. Consider it your own private Earth database.
The first place loaded files appear is in temporary places. Data imported from external sources will show up in Temporary Places. If you want to keep it, don't let it stay here! Drag the layer up into My Places if it's one you want to keep and save it there.
It is entirely up to you how you decide to arrange your spaces. Your locations are organized into several folder stacks.
Adding Layers
The ability to import layers is arguably Google Earth's most helpful feature. This is because you may load and use seemingly limitless files.
KML files, which also operate with KMZ files, include spatial data that serve as map overlays in Google Earth. There are a ton of helpful KML files available. After downloading one, all you have to do to open it in Earth is double-click it. Remember to transfer it to My Places if you wish to keep it.
One particular file is Earth Point Topo, which adds a topographical map to Google Earth. It should be rather clear why this may be helpful occasionally.
Road usage, trails, trailheads, campgrounds, species information, and property borders are other KML categories to consider. You can Google them to find more fish all over the internet.
A driving time file is another beneficial KML file. Several of these services are available online. It will display an area that roughly corresponds to how far you may go in all directions after you enter your home address and a period. This is helpful when you know how much time you have for a vacation and want to check where you can stay.
If you wish to display numerous layers simultaneously, right-click on the layer and select "Settings." Then, select "Style, Color" to adjust the layer's opacity.
Your folders and layers may be turned on and off on the map by checking and unchecking the boxes next to them.
Making a Mark and Saving Your Spots
It's time to start exploring for and marking locations after arranging your place folders and having your pertinent layers included.
With Google Earth's capabilities, you can designate a location after you've located it. Placemarks, polygons, pathways, and other objects are among them. You can experiment with other helpful resources on Earth, such as sunshine and historical imagery, if they'll help in your scouting.
Click the Placemark button once you've located a place (or region, or line; the procedure is essentially the same for the various markers). The placemark can be moved and its information modified. To make it helpful for you, give it a name, a description, etc. You may also alter the symbol by selecting the waypoint picture next to the name.
The new waypoint will be added to whichever folder you have chosen. If necessary, you may always reposition them at a later time.
When you're finished, you may exit Google Earth, and the next time you open it, it will continue from where you left off. But there's no guarantee that Google Earth won't collapse periodically if it's overloaded, and there's also no assurance that your computer won't malfunction eventually, wiping out all of your data.
As a result, it's crucial to back up your locations after a lengthy work session and periodically just for peace of mind. To accomplish this, choose My Places from the list of folders and click File > Save > Save Place As. The full My Places folder structure may then be saved wherever you choose. To ensure you always have your data, back this up somewhere secure.
Tips to efficiently find fishing spots:

An Angler’s Perspective
The finest tool for exploring both old and new streams is Google Earth. It will assist you in comprehending and interpreting any system's sand bars, channels, obstructions, and other structural elements. It could even turn up previously unknown hidden mysteries at your favorite fishing spots.
Google Earth gives you a huge advantage in comprehending the characteristics and scope of the fishing terrain while looking for new fishing habitats or arranging an offshore fishing excursion to a remote location. It is the best resource for fishing expedition planning.
Identifying Access Points
Finding appropriate access might be difficult while fishing unfamiliar waters, especially off the main path. Physical exploration may be time-consuming and tedious across houses, highways, and wilderness. Many paths will go nowhere.
By enabling you to identify probable access and exit locations to a system precisely, Google Earth significantly reduces the pain. You can locate forest clearings, fire routes, bridge crossings, boat ramps, access channels, and harbors from your home. With such effectiveness, you spend less time wasting and get to the fish faster.
Accurate Measures
Google Earth's distance function is a highly useful tool for calculating distances to fishing areas. The scale may be adjusted to meet the needs and be used to determine the length of a water access point or the distance from a boat ramp to a prime fishing location.
The distance tool is an excellent planning and exploring tool to assist you in making important boating and hiking decisions.
Mark, Map, and Save
One of Google Earth's other amazing features is the ability to pin placemarks, routes, or polygons to the maps to identify and mark out new fishing spots or areas. You can mark areas that might be good for fishing or make it evident where fish have been caught.
These tools will keep you on the course when you're on the ground investigating and might be useful for clearly delineating access channels or trails. Another useful function is sharing information with friends and exporting marks as KML files to and from GPS units.
Print, Copy, and Prepare
It's a good idea to print the maps at different scales once you've located suitable fishing places, access routes, or significant landmarks to have a fast reference when you're on the water. Any printed maps should be kept in a water-resistant zip-lock bag. Take screenshots of the maps and save them in an album on your phone as an additional option.
Installing and using Google Earth on your phone would be the logical choice in locations with mobile phones and data connectivity.
How to find fishing spots on Google Maps?
Another way an angler can easily look for a good fishing spot is Google Maps. It will load up an aerial image of your favorite lake in the region, showing you the roads, the lake, fallen trees, and other potential fishing spots.
To find water more easily, start with the default map view. You'll want to check for a few crucial items, so you'll go to satellite view to zoom in and properly see the region.
While looking for a target spot, here are three things you need to make sure to have efficient scouting:
1. Make sure fishing is permitted.
The first thing you should check is whether you can fish there. Most places allow it. However, a handful are privately owned. Look for parking areas close to the seashore, see any boat launches, and see if any roads are nearby. In such a scenario, you're all set to travel.
2. Make sure it is a decent spot.
The second thing you should check is whether it's a good place to go fishing. There is no way to tell for sure, but there are a few factors you should check for to improve your chances of getting anything.
The key thing you should search for is covered areas. That cover could consist of weeds, large boulders, or fallen trees. You should go wherever the fish could be hiding. Additionally, it could be near bridges, dams, boat ramps, docks, or pinch-off places.
3. Make sure it is accessible.
Ensuring you can get there is the last thing you want to check. You may see a fantastic location, only to discover that there is no way for you to enter. Ensure there is a path, trail, or sparse vegetation before going.
This is mostly for bank fishermen; it won't matter if you're in a boat. If there isn't a sign for a road, you may return to the default map view, and it will display all the nearby trails.
Street View
Use Street View to zero in on the location once you've looked at the area on Maps. However, it will offer you a comprehensive perspective from the street to see the neighborhood and how to get to your position. You may use this option on Maps or Earth. Parking spaces, trailheads, and many other items that save you time will be visible.
Navionics
Another option is to utilize the Navionics app to view what is below the water's surface. Although you may use it for beach fishing, it will be most useful when on the water.
If you do this, You'll better understand where the various fish species may be in the water.
In essence, it will display the water's depth and current direction. spots in the water, and the locations of the drop-off spots will be visible. These places are often great for fishing.
In Conclusion

In the modern world, it is difficult to envision a fishing trip or exploration without Google Earth and Google Maps. Without these incredible satellite and mapping program advantages, even the most experienced anglers would be lost.
